Branch Journeys smart banners are a powerful, customizable tool that seamlessly direct new and existing mobile web users to corresponding apps. With the ability to personalize branded creatives, set up unique audience rules, and A/B test banner variations, Journeys offers a slew of configuration options to tailor the web-to-app experience.
Upon completing the Journeys setup in your Branch Dashboard, you might wonder, “How can I be sure my banners look good to users and function properly once I launch them?” Good news: Branch has you covered with multiple methods to thoroughly test your banners before a full-fledged launch.
Method 1: Use your test Environment
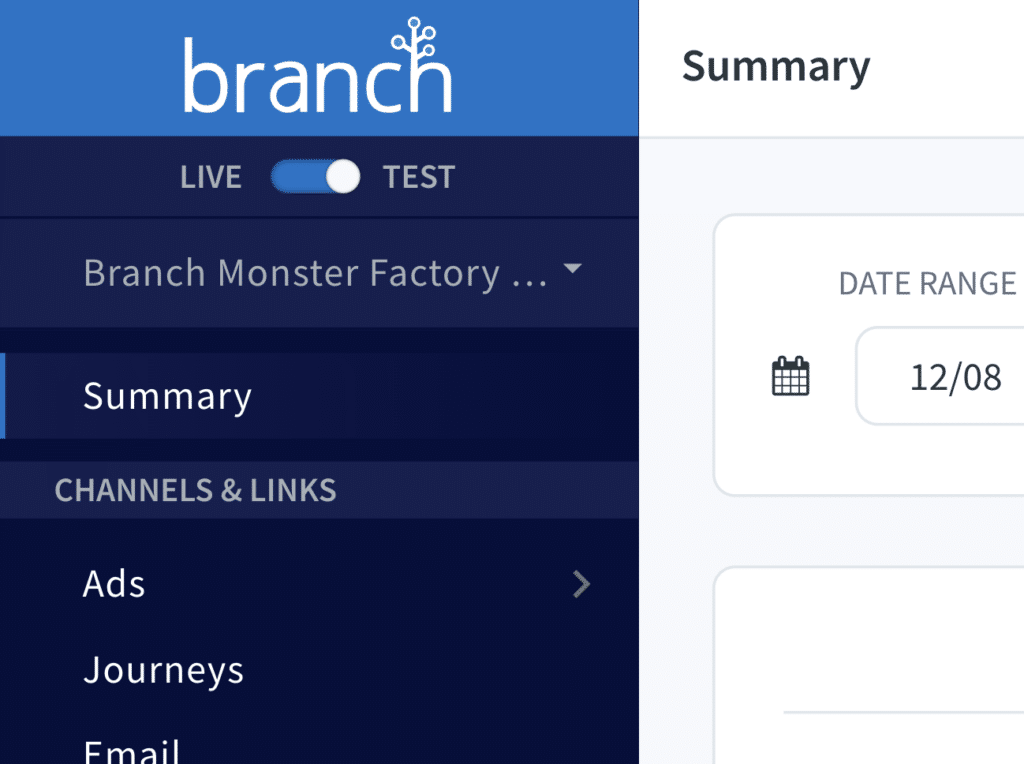
By default, in the Branch Dashboard, you have access to both test and live environments. To switch from one to the other, you simply use the toggle at the top left of the Dashboard.
To get started, make sure you are in the test environment. Then, navigate to the Journeys tab to set up the banners you want to test. Note that to carry over Journeys from the test environment to the live environment, you need to manually recreate them.
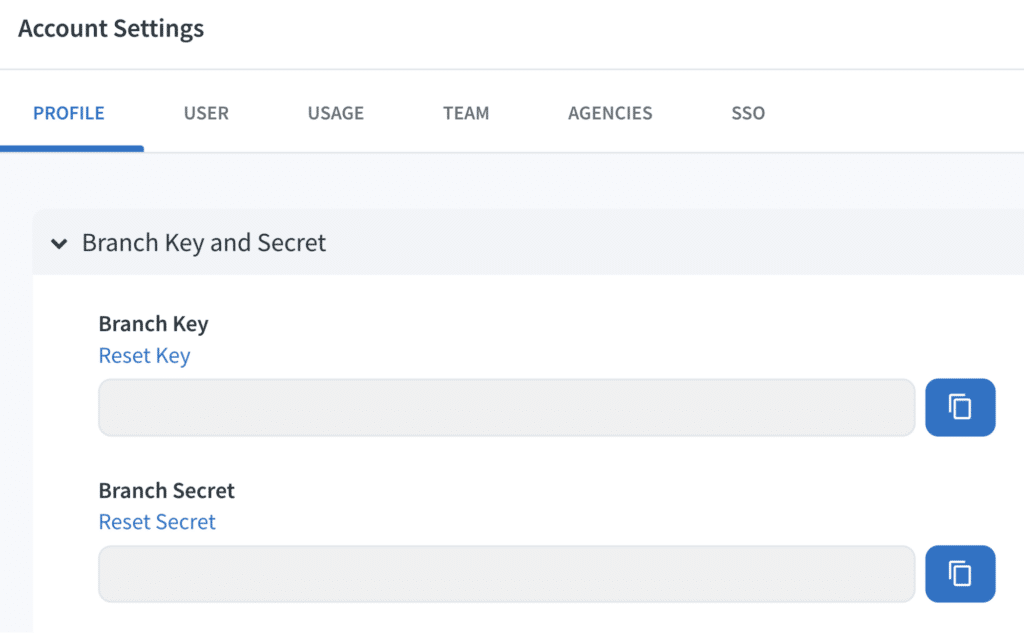
Next, verify that your web engineers have integrated the Branch Web SDK into your webpage test environment using the Branch API test key from the Dashboard.
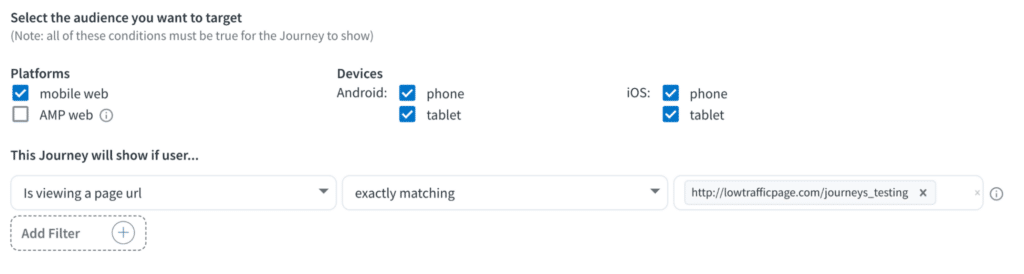
Before launching your test banners, ensure that the filtering criteria are simple and easy for the tester to match during testing (e.g., ‘user has completed one web session’), then adjust as needed when moving the Journey to the live environment.
You’re now ready to launch and validate test banners on your internal test site! Remember to replace the Branch API test key with your live key when you’re ready to launch banners on your website from the live Branch environment.
Method 2: Use the Branch URL testing tool
When you reach the final step of configuring Journeys banners in the Branch live environment, you’ll see a preview of your Journeys and an input field. Here, enter your website’s URL to generate a test link.
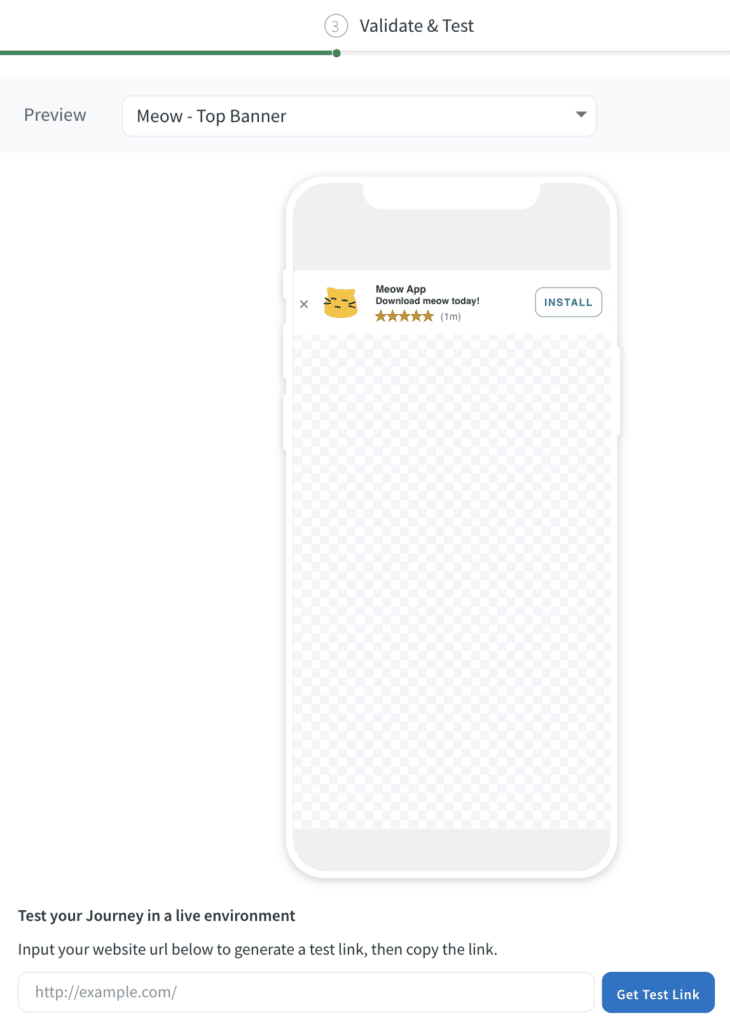
This URL can be any page on your web map where the web SDK is currently active. If possible, we advise using the web URL of a page that will display the banner once it’s live. This will help you visualize how the banner will look and feel in production.
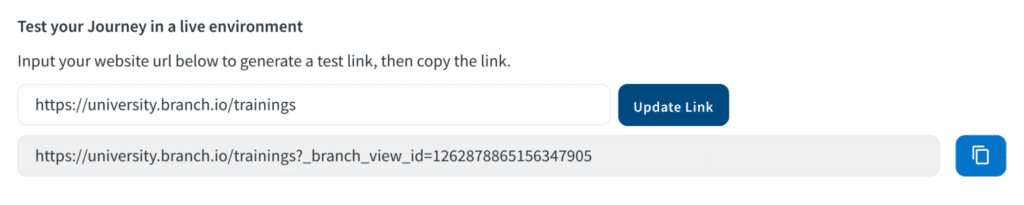
After clicking on the “Get Test Link” CTA, you’ll receive your inputted URL with an additional query parameter indicating it’s a test link. Only individuals with this test link can view the banner test rendering on the live page. Don’t worry — the banner isn’t live on this web page, so your end users won’t see any changes while you’re testing with this URL!
This tool allows you to test the look and feel of banners on your web pages but not the actual deep linking functionality. Additionally, since this unique URL is a single page, if you navigate around to other pages, the banner will not persist. Note that filtering criteria are not considered in this scenario, so we don’t recommend using this method to test end-to-end user flows.
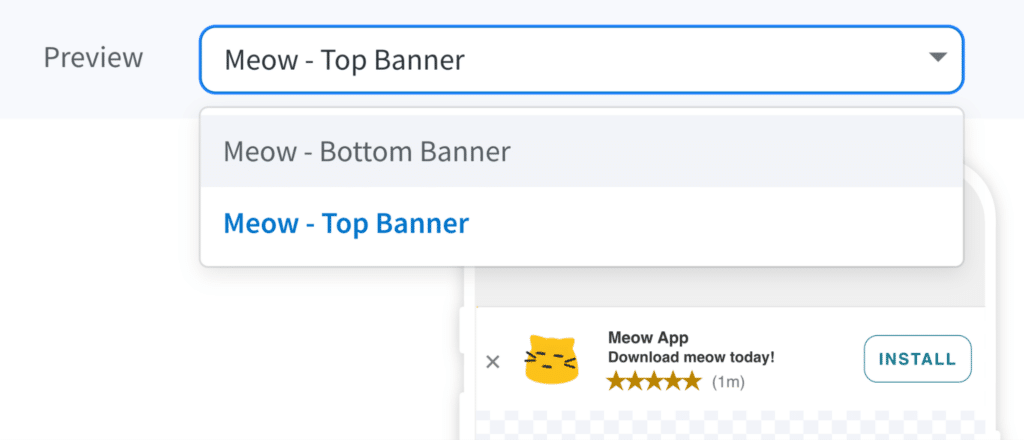
At the top of the page, you can use the Preview dropdown button to switch the creative variation you’re previewing. Don’t forget to click “Update Link” when you switch between variations.
Method 3: Test live on a low-traffic URL
This final technique allows you to test your Journeys on a live, in-production page, so you can test the entire end-to-end user experience in a small, controlled simulation. When you’re ready to launch a banner in your Branch live environment, identify your least-visited pages. Then, adjust the Journeys filtering criteria to target one or a few of these low-traffic pages.
To minimize the likelihood of your end users encountering the banner during testing, we recommend conducting tests during your website’s lowest traffic hours.
Now, you’re ready to launch your banner test! With this method, you’ll be able to thoroughly validate in your live environment that your banner renders correctly, deep links users as expected, and responds appropriately to user navigation between pages — persisting on pages that match filtering criteria and not rendering on those that don’t.
Once you confirm that your banner behaves as intended, you can fine-tune the filtering criteria to your desired configurations and validate once more, confirming that all end-to-end user flows function.
Best practices to remember
Follow these best practices to ensure a smooth and successful launch:
- Use Branch’s A/B tool to facilitate a phased rollout. By leveraging the A/B tool in Step 2 of your Journeys setup process, you gain complete control over how many users see a given Journeys’ campaign. Use the tool to gradually launch your campaign by incrementally increasing the audience reach from 0% to 100%.

- Launch invisible banners with your desired filtering criteria. If you’re hesitant about launching a full-fledged Journey campaign to a certain audience, consider starting with blank banners. This won’t disrupt your current user experience, yet with the Web SDK’s ability to track pageviews out of the box, you can gauge the true impact of your audience filtering concept.
- Regression test all new and existing banners with every launch. Validate end-to-end flows by mimicking complex user journeys with every new Journey you launch.
- Validate all variations separately. If you’re running A/B variations, set one of your variations to target 100% of your audience upon launch. Confirm this variation functions as expected, then repeat for all of your remaining variations. Once all of your variations have been validated, assign the desired audience percentages for this campaign.
If you have questions about configuring and testing your Branch Journeys, reach out to your account team. Go to the Branch Dashboard to get started!