
Over 70% of the top mobile games on the market are built on Unity, a popular cross-platform game engine that has become ubiquitous in the industry since its release in 2005. For teams that use Unity to build cross-platform mobile games or apps, Branch’s Unity SDK is a great tool for implementing deep linking, attribution, event tracking, and more.
This blog post highlights our Unity SDK’s key features, as well as some pro tips for integrating it into your project.
Why use the Branch Unity SDK?
The Branch Unity SDK provides a number of benefits for your app, namely a better and more engaging user experience for players. By generating Branch links, you can route users directly to in-app content from any platform or channel. It also enables features like share sheets, letting users share links and other content from your app. Plus, Branch’s Unity SDK enables you to set an identity on events that can be used for cross-platform and device deduplication. Furthermore, you’ll be able to track events in the Branch Dashboard and other third-party analytics platforms.
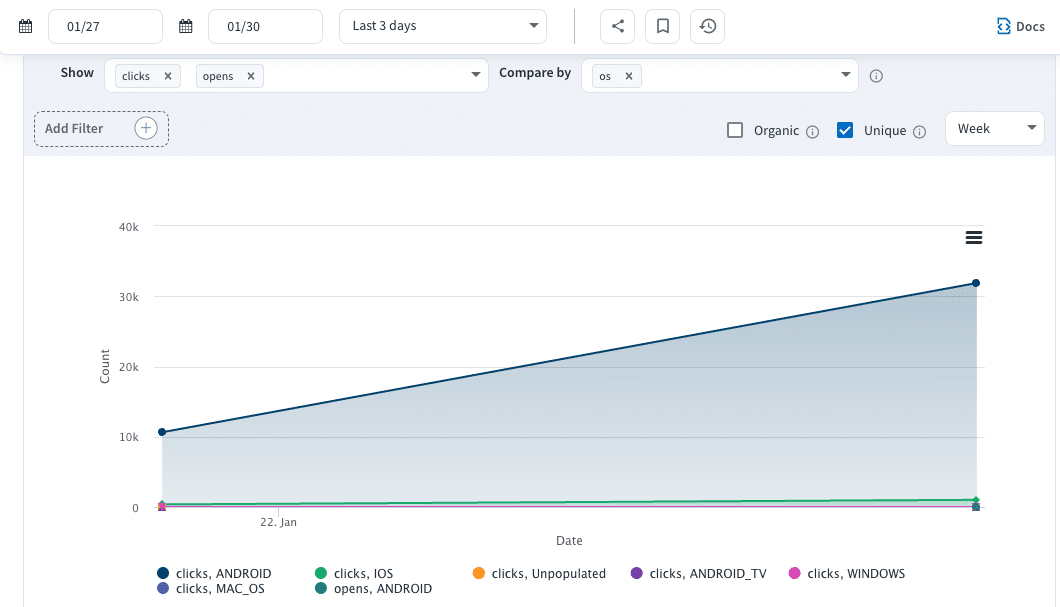
Screenshot of the Branch Dashboard showing app clicks and opens by operating system.
Without Branch’s Unity SDK—or if you use another game engine aside from Unity to build your mobile game—you would need to create a wrapper for Branch’s native Android and iOS SDKs in order to tap into this functionality or leverage a third-party solution.
How does it work?
The first step to using Branch’s Unity SDK is downloading the latest version and importing it into your project. Inside the imported Branch folder, you’ll find the Branch Prefab, which you can drag and drop into the first scene of your Unity project. It is important that it is placed in the first scene that opens when the app starts up so that the Branch SDK initializes and provides the data needed for deep linking functionality when the app is opened from a Branch link click.

If you select the Branch Prefab object in the hierarchy, you’ll notice a Branch script attached in the inspector. Here you can enter information to link to your Branch Dashboard. The required fields are Branch key and App Links. Your Branch key is in the Account Settings section of the Branch Dashboard. For the App Links, navigate to the Configuration section. Finally, click “Apply Changes” to automatically update the native AndroidManifest.xml and Info.plist files, respectively. Note that if you have existing settings already setup in these files, it is possible to add these fields manually by following these Android and iOS steps.

When you import the Branch SDK, you’ll get access to two folders: one is the Branch folder inside of the Assets folder, which has the C# scripts and Branch Prefab to add the Branch functionality to your app. The other is the Branch folder inside of the Plugins folder. Inside that are Android and iOS folders, which house the native code that the C# code utilizes to provide access to the native Branch functionality.
To get the maximum benefit from the Branch Unity SDK in your mobile game or app, it is important to understand the various C# scripts that make up the functionality of this powerful cross-platform SDK and use them to your advantage when building new features. The Branch script is the Branch singleton object, which has the public methods you will be calling throughout your project when you want to tap into Branch functionality. To see which version of the Branch SDK you are using, look at the sdkVersion variable at the top of this file.

Inside of the BranchEnums.cs script, you’ll find the enums that Branch defines, including currency type, all 25 standard events from our Event Ontology, and product categories.
Two concepts that are very important but will be new to you if you haven’t worked with Branch SDKs before are Branch Universal Object (BUO) and Branch Link Properties.
Branch Universal Object stores any content in your app that you want to track as metadata for an event—such as a product that can be purchased. This makes things like event tracking and content sharing easier and even helps boost your website’s SEO ranking when a user engages with your app content.
Branch Link Properties are the fields that you have access to when a Branch link is clicked, such as the path to the deep link content, the last-attributed-touch data, and other metadata fields associated with that link. In the BranchLinkProperties.cs file, you’ll see items like tags, feature, alias, stage, and match duration. The control params are where the rest of the deep linking and custom data will be stored, which you can access when the Branch SDK initializes to deep link the user. You can also access these at any time during the session by calling Branch.getLatestReferringBranchLinkProperties() to retrieve the latest referring parameters from the Branch link click. For more information on reading deep link data and routing the user to in-app content, be sure to check out these step-by-step details in the Branch help docs.
Avoiding conflicts with other plugins
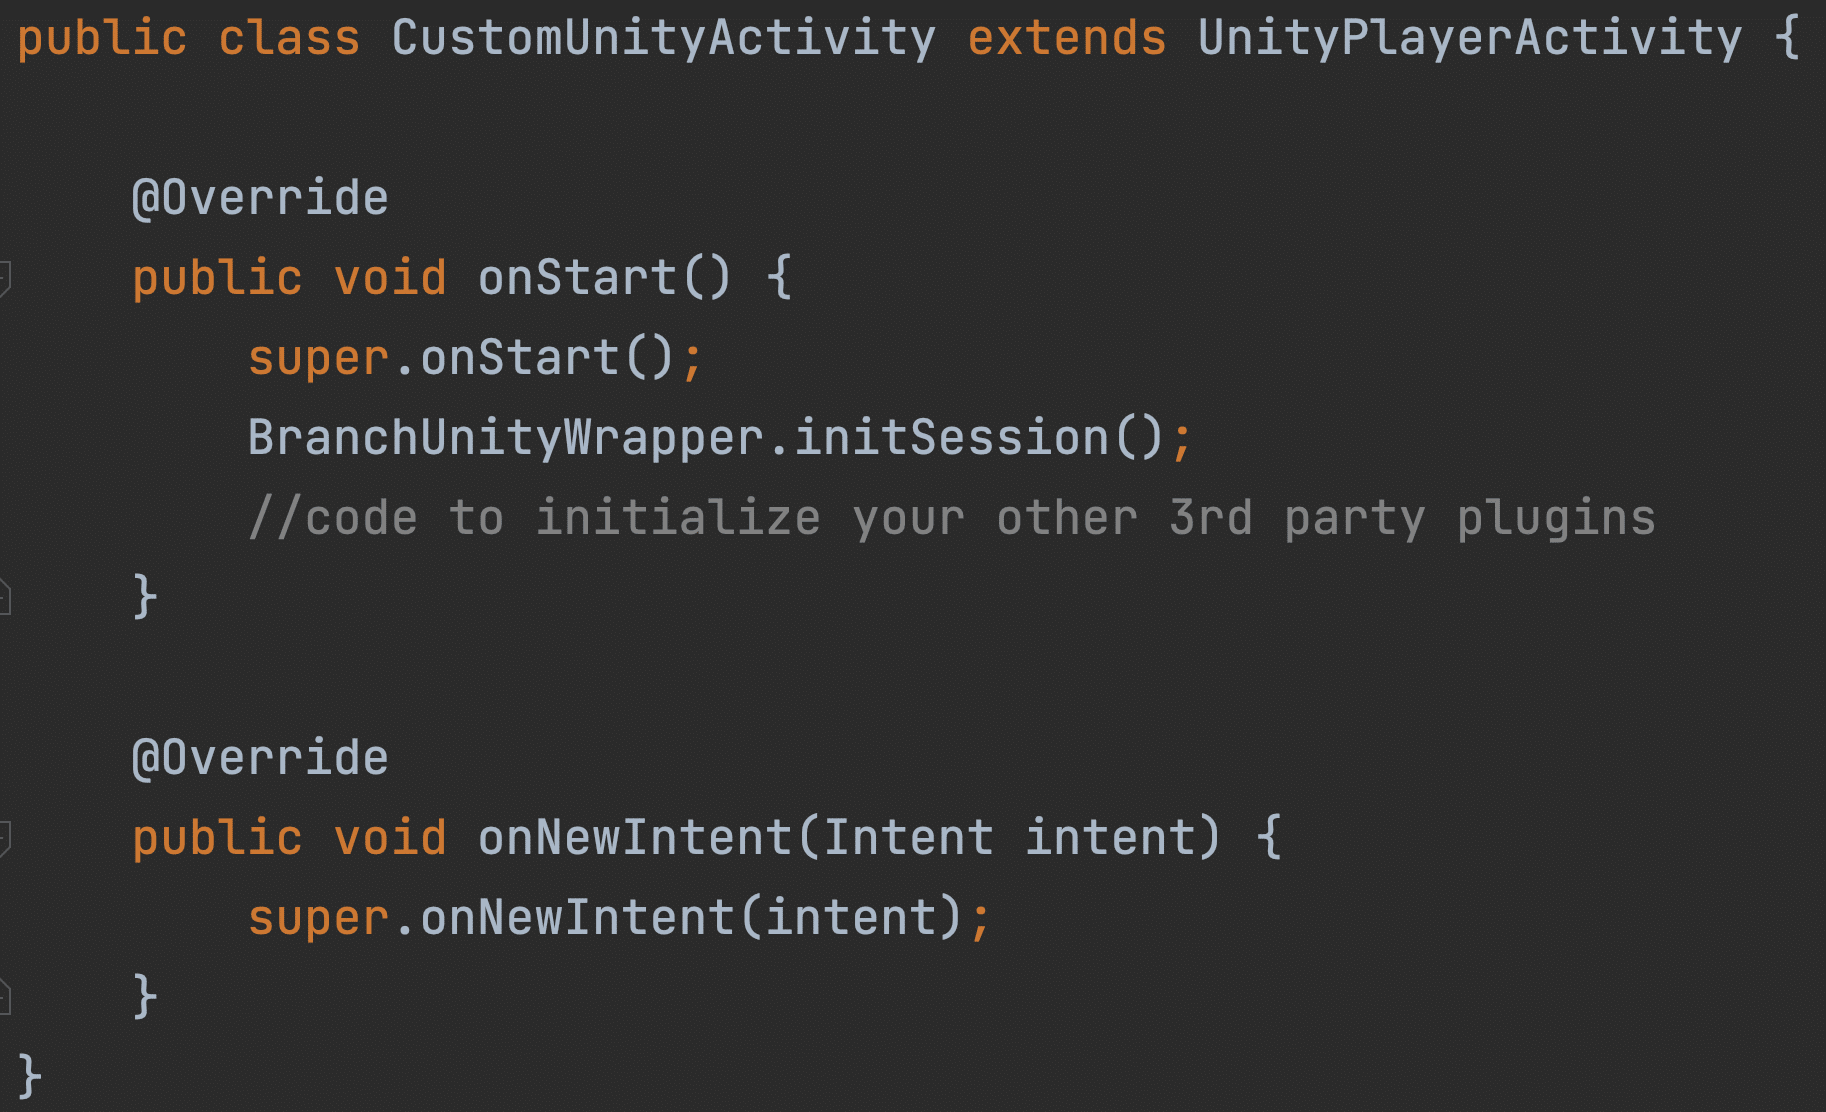
If you already use several third-party SDKs in your Unity project, chances are that those SDKs may have their own custom activity and application classes that can cause conflicts with other SDKs like Branch. To avoid any conflicts, follow these steps:
1. First, create a native Android file that extends the Activity class. Inside the onStart() function, it is important to call the BranchUnityWrapper’s initSession() function so that the Branch SDK gets initialized at the native layer. You can also add the initialization code for the other third-party plugins here as well. Override the onNewIntent() function, and make sure the super class’ version of the function is called in there.
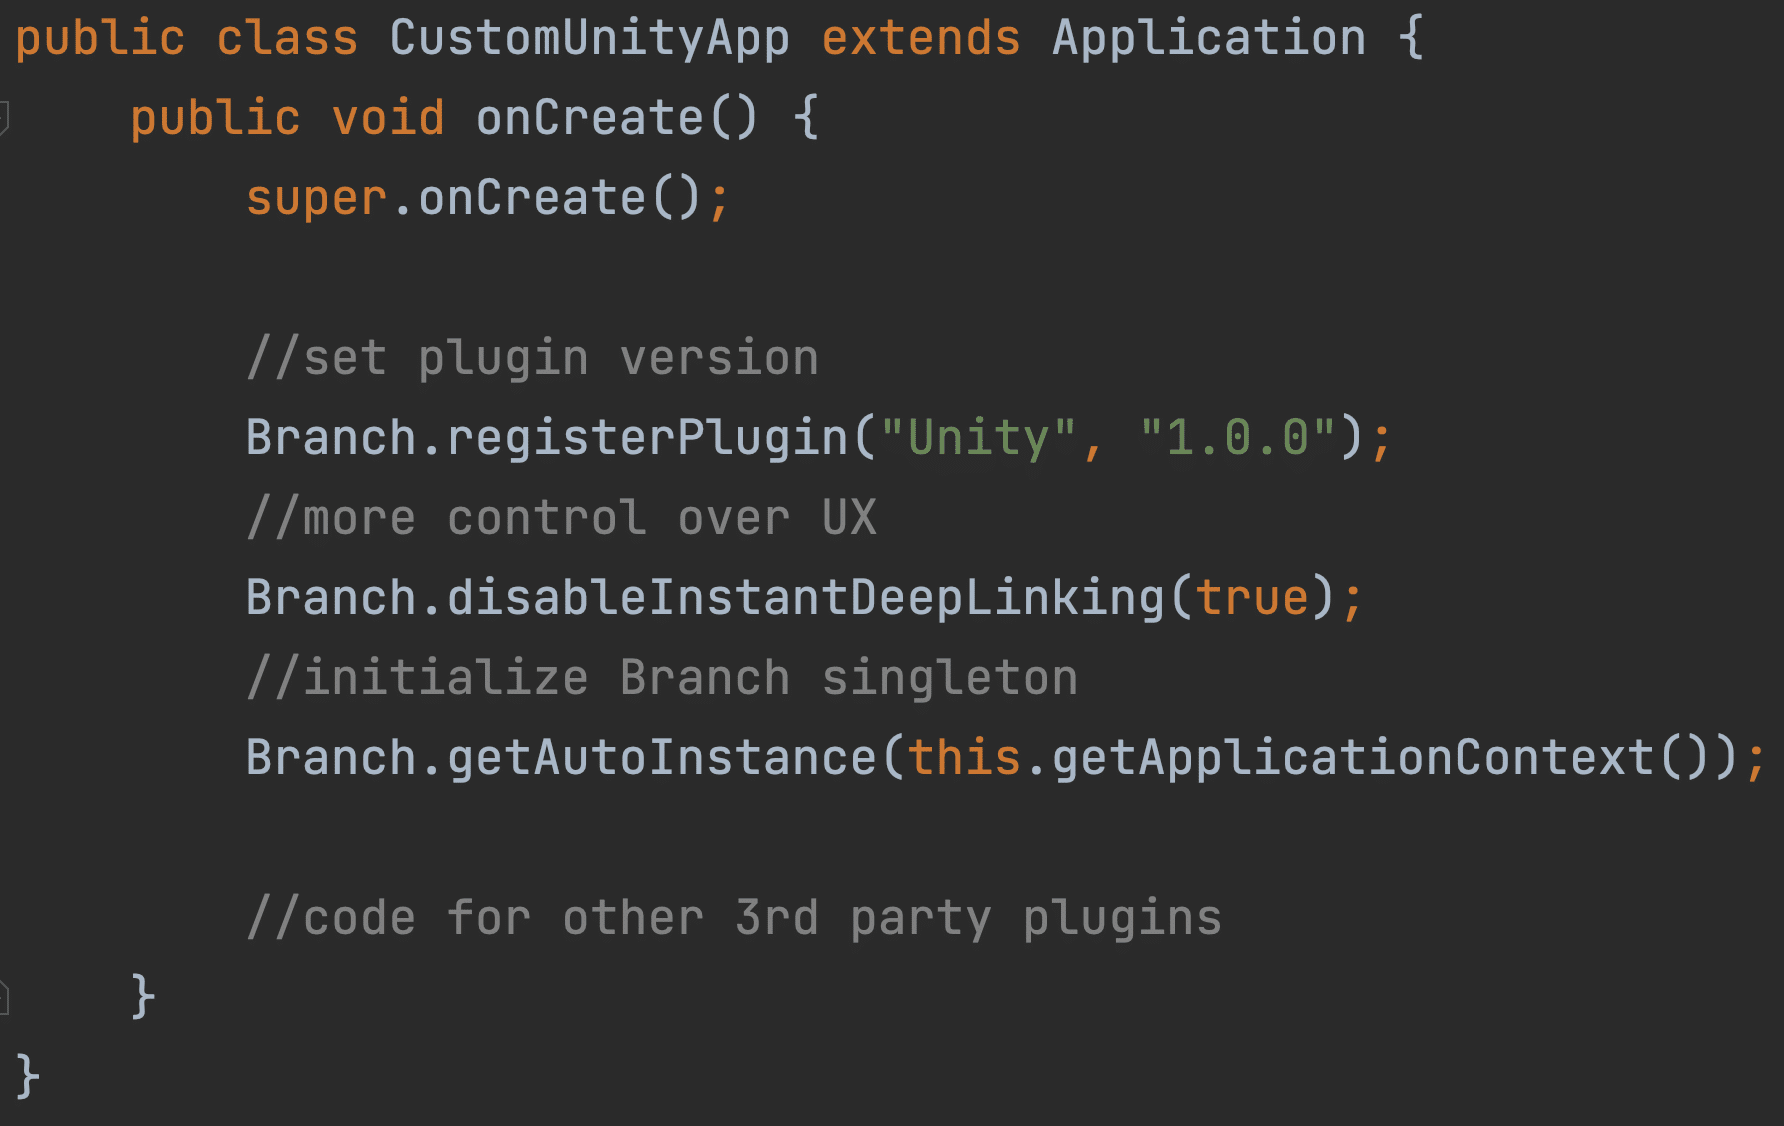
2. Next, create a custom application class that extends the native Android Application class. Inside the onCreate() function, register the version of the Branch plugin, disable instant deep linking to have more control over the users’ deep linking experience, and initialize the Branch singleton. After, you can add any code required by other third-party plugins in your app.
Next steps
Find step-by-step setup instructions for integrating Branch’s Unity SDK into your mobile game in our help documentation. To learn more how you can boost mobile game user acquisition and reengagement using Branch, check out this post: Level Up Your Mobile Game With Branch.
To get started, request a demo with our team.