Over the last few years, the mobile app ecosystem has seen a tremendous amount of change. Every year, developers get to play with a bunch of new toys that help build better products and businesses. Google’s mobile search platform is a perfect example of one of those toys.
Using Firebase App Indexing to List and Rank App Content
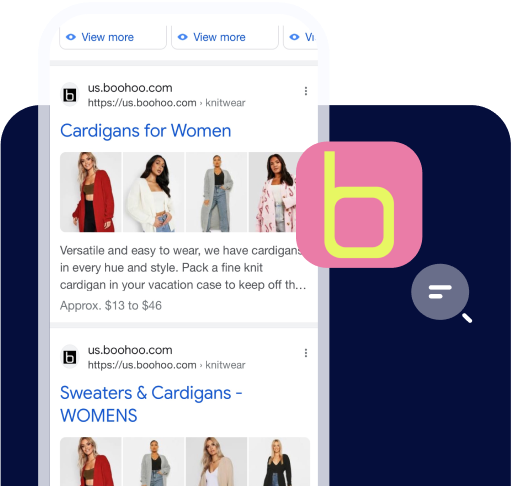
Google’s primary business is based on web page discovery through their search portal. With the rise of mobile apps as the preferred medium for user interaction, Google’s web search has had to quickly iterate to stay relevant. Google’s App Indexing, now called Firebase App Indexing, is their response to the popularity of mobile apps. It allows users to find ‘mobile deep links’, or links that point to app pages, in normal web search. This means that as an app developer, you have the ability to attract users through traditional Google search.

This article will teach you exactly how to get your app indexed by Google. Note: All of these steps can be skipped by simply utilizing Branch Universal Object as described in the last paragraph of this piece.
How Does Firebase App Indexing Work
First off, it’s important to realize that Firebase App Indexing requires that you have a website. In order for App Indexing to work, you’ll need to configure a website for Google to index and map it to your app.
Here’s how Google indexes your app:
- Googlebot visits the URL to your website (eg. mywebsite.com/blog/post12345).
- Googlebot scrapes the content on the page (the blog content and picture).
- If the Android metatag (<link rel=”alternate” …>) or your Apple Universal Link JSON (apple-app-site-association) file is configured correctly, Google will flag that URL as having a corresponding app page.
As you can see, in order to be ranked on Google through App Indexing, you’ll need to build a web destination and map the web content one to one to your deep linked app pages. However, as you see in part three of their process, you need to make sure that your website is properly configured to notify Google that the URL corresponds to an app page.
App Indexing Integration Checklist
App indexing can be configured quickly with minimal changes to your app by following these steps.
Required
- Build a website optimized for mobile
- Ensure the Googlebot can scrape your site
- Add headers to the site for your Android app
- Configure your Manifest for your Android app
- Configure your domain for Universal Links for your iOS app
- Configure your entitlements and PLIST for your iOS app
Optional: Configure deep link routing
Counter to the documentation, you don’t actually need to wire up your app to support deep link routing. As long as your domain and app are configured to open appropriately when a link is clicked, you’re good to go. However, from a user’s perspective, being routed directly to the appropriate page in the app is a much better experience and will result in better engagement and retention.
Optional: App Indexing SDK
Google seems to be pushing an ‘App Indexing’ SDK, but we’ve found it to be unnecessary as long as you configure your site and app as instructed above.
App Indexing Step by Step Integration Guide
Step 1. Build a website optimized for mobile
In order for your app to appear in Google search through App Indexing, you’ll need to build a mobile site that contains all of the publicly searchable content that you want users to discover. This is how you tell Google the metadata about what the content actually is. For example, if you have a news article about the various types of cat hairstyles, you want Google to know the keywords associated with the cat hairstyles.
Your site will contain the content that will be discoverable on Google search through App Indexing. Make sure it follows all traditional SEO guidelines for maximum discoverability.
Step 2: Ensure the Googlebot can scrape your site
Now that you’ve built and hosted your website, you need to make sure that the Googlebot can scrape it.
This can happen naturally if you’re patient, or you can force a scrape sooner rather than later. We’d recommend that you sign up for Google Webmaster Tools and follow the guidelines in the ‘On-demand Indexing’ guide for Google. Using a sitemap will ensure your website is quickly indexed and give you feedback on the quality of the scrape.
Step 3: Android requirement: Configure your Manifest
The first thing to do with your Android app is to make sure that you’ve enabled it to open with the click of a link. This is easy to do. Just pick the Activity you would like to open and a URI scheme that you would like to trigger your app to open.
In the example below, I’ve picked ‘your_app_scheme’ as my URI scheme to open up the app and structured the intent filter like so.
Paste this intent filter snippet between the <activity> </activity> tags for the Activity you’d like to open when the search result link is clicked.
Step 4: Android requirement: Add headers to your site’s pages
Now that the app is configured to open, you must list your app’s deep links in the header metadata on your site. For each page, you need to add the appropriate deep link information as a <link> tag on your site.
In the example below, I assume the following:
package name: your.package.name
URI scheme: your_app_scheme
deep link path: blog/post12345
Note that we’re not using the host field in the deep link, which is why there are two forward slashes ‘//’ before the path.
Step 5: iOS requirement: Configure your app for Universal Links
In order to configure your app to support Universal Links, you’ll need to register for an ‘associated domain’ entitlement. In the domains section, add the appropriate domain tag. You must prefix it with “applinks:”. In this case, you can see we added “applinks:yourdomain.com”.
If you see any errors, head over to our blog on Universal Links more details.
Step 6: iOS requirement: Configure your site for Universal Links
Once you’ve configured your app, the last step is to create the apple-app-site-association file and host it on your site.
You can see an example of the file structure below. The only fields you need to change are associated with: T5TQ36Q2SQ.com.branch.sdk.TestBed. This is actually two values (Prefix and the ID) joined together with a period. Both values are found on developer.apple.com by going to Identifiers and checking the App IDs section.
Host this on the root domain that you’d like to enable for Universal Links and you’ll be all set. One word of caution, if you don’t have HTTPS set up on your root domain, you’ll need to actually sign the file with an SSL cert. You can read more about this on our blog post on SSL certification.
There you are! You’re all set for Google App Indexing.
Branch Simplifies the Entire Process
Now that you’ve got a solid understanding of how it all works, I’ll let you know how you can avoid doing all of this. At Branch, we’ve found that all of these deep linking standards can make your life difficult. To make matters worse, they constantly change.
In order to have your app content indexed and listed on Google automatically, just use the Branch SDK to create a Branch Universal Object every time a page is loaded in your app. We will categorize and index this content for you, then create a sitemap and deliver it all to Google [coming soon]. You don’t even need a website to get started.
As if this weren’t easy enough, the same Branch Universal Object allows you to create deep links, share content, and get helpful analytics around which pieces of content are driving the most engagement and growth.
Start using Branch to index your app content by clicking the button below.

