

Key takeaway
Branch’s new Integration Validator for Android makes testing easier by automatically checking your setup to help you catch issues before launch.
Branch’s Android SDK enables extensive functionality for your app, making it important to thoroughly test the integration before release. To streamline this process, Branch has revamped its Integration Validator tool to automate testing.
New functionality includes:
- Automated configuration testing, including Branch keys, package name, and domains
- A popup modal displaying test results
- Detailed failure explanations with links to relevant documentation
- Single-click log exporting
- A deep linking validator with auto-generated links for edge case testing
- Testing how a Branch link behaves when clicked under different app states, such as when the app is in the background (warm start), in the foreground, or handling deep linking from a foreground click.
This post walks you through how to use the new testing and validation features to ensure your Branch integration is set up correctly.
How to validate your Branch SDK integration
Before using Branch SDK features, verify your setup with the following steps:
1. Add the following line of code to the bottom of the Main Activity’s onStart() function in your app: IntegrationValidator.validate(MainActivity.this);
2. Run your app on a device or emulator. The Branch Integration Validator modal will appear, showing:
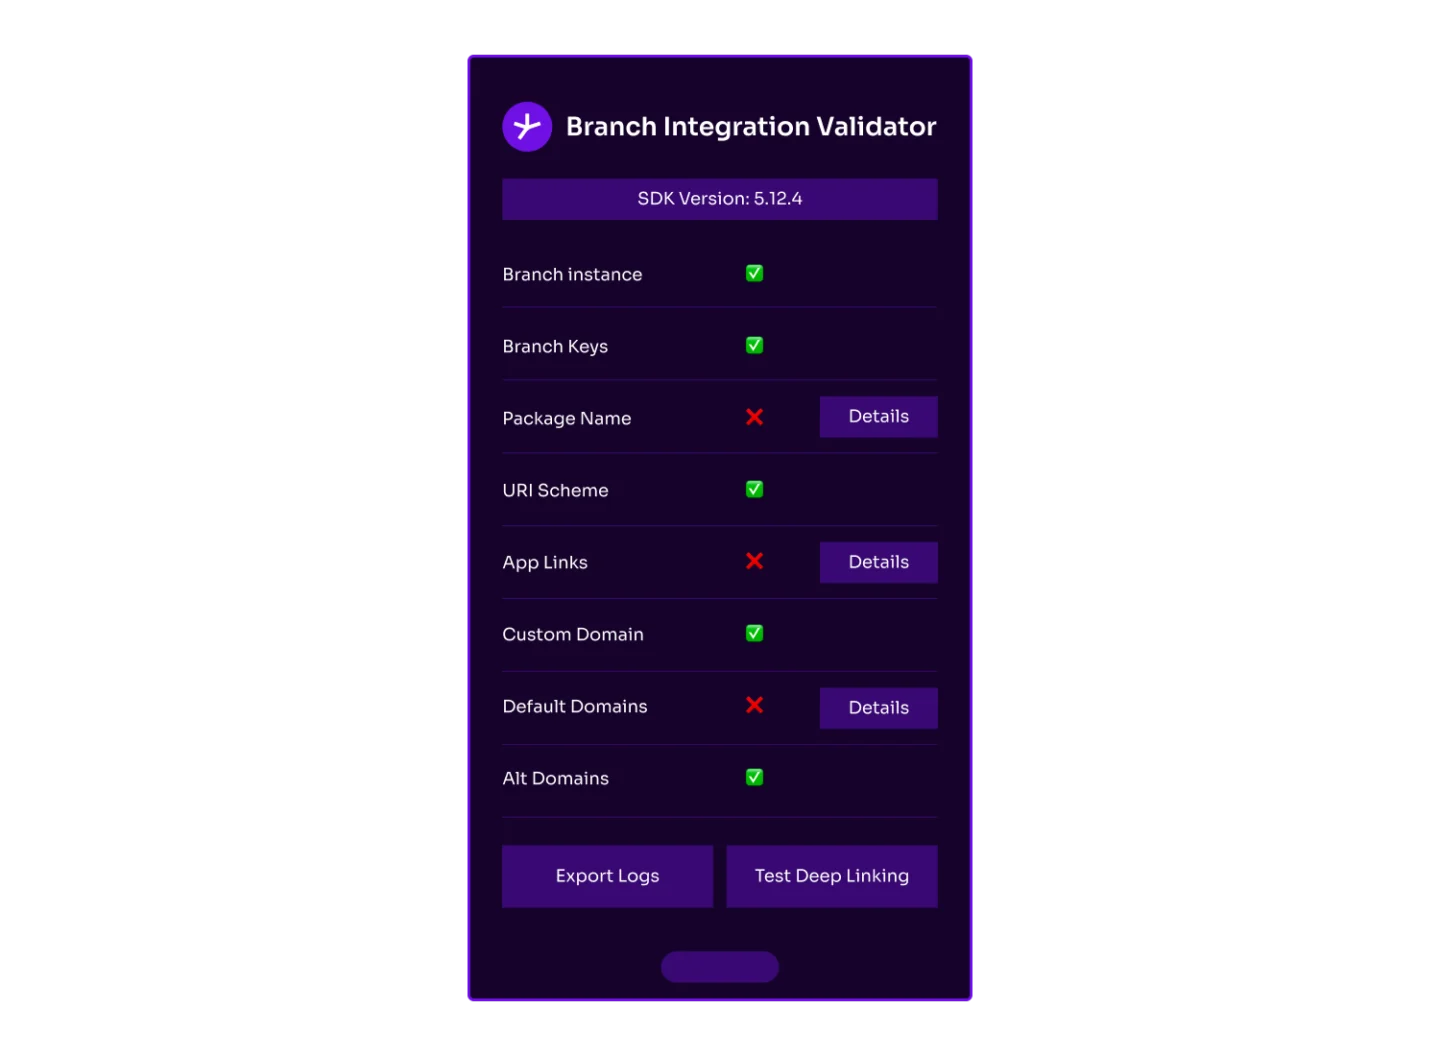
- SDK Version: Confirm you are using the latest version. Check the Branch Android SDK Version History.
- Validation tests: Each line item represents an integration check, along with a check icon if the test passed or an “x” if it failed. Let’s review what each test means.
- Branch Instance: Verifies that the Branch singleton object is successfully initialized.
- Branch Keys: Checks that you have added the Branch keys into your app.
- Package Name: Validates that the package name on your Branch Dashboard matches the package name of your app.
- URI Scheme: Ensures that the URI scheme you added to the Android Manifest matches the URI scheme entered in your Branch Dashboard. This is important because Branch links will fall back to using URI schemes to open the app if App Links fail.
- App Links: Ensures that Branch links were properly configured to work with Android App Links during setup.
- Custom Domain: Checks that the custom domain in your app matches the one in your Branch Dashboard when applicable.
- Default Domains: Checks that the app.link and test-app.link domains from your Branch Dashboard have been added to the AndroidManifest and that the values match.
- Alternate Domains: Checks that the -alternate.app.link and -alternate.test-app.link domains from your Branch Dashboard have been added to the AndroidManifest and that the values match.
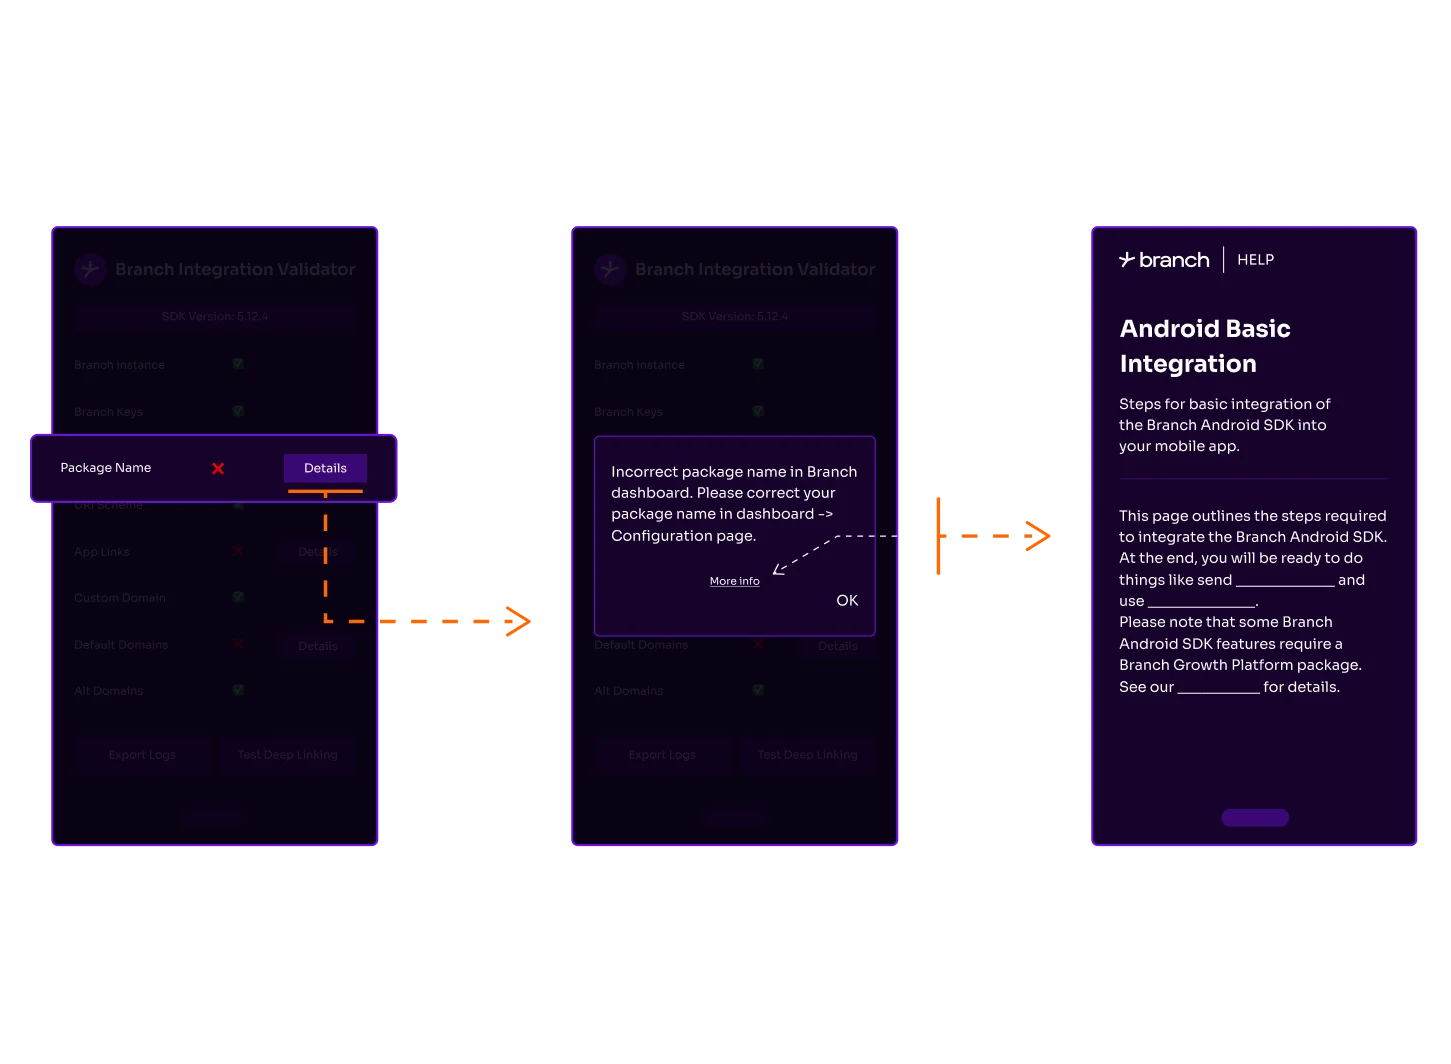
If a test fails, you will also see a blue ‘Details’ button. Click this button to see the identified issue. Use the ‘More info’ link to go directly to the relevant part of the documentation with instructions for fixing it.
3. Use the ‘Export Logs’ button to copy or share logs. This is especially helpful if you need to contact [email protected] for assistance.
After validating your Branch SDK integration, the next step is to test the deep linking functionality.
How to validate your Branch deep linking logic
1. Open the Integration Validator modal and click ‘Test Deep Linking’ on the bottom right.
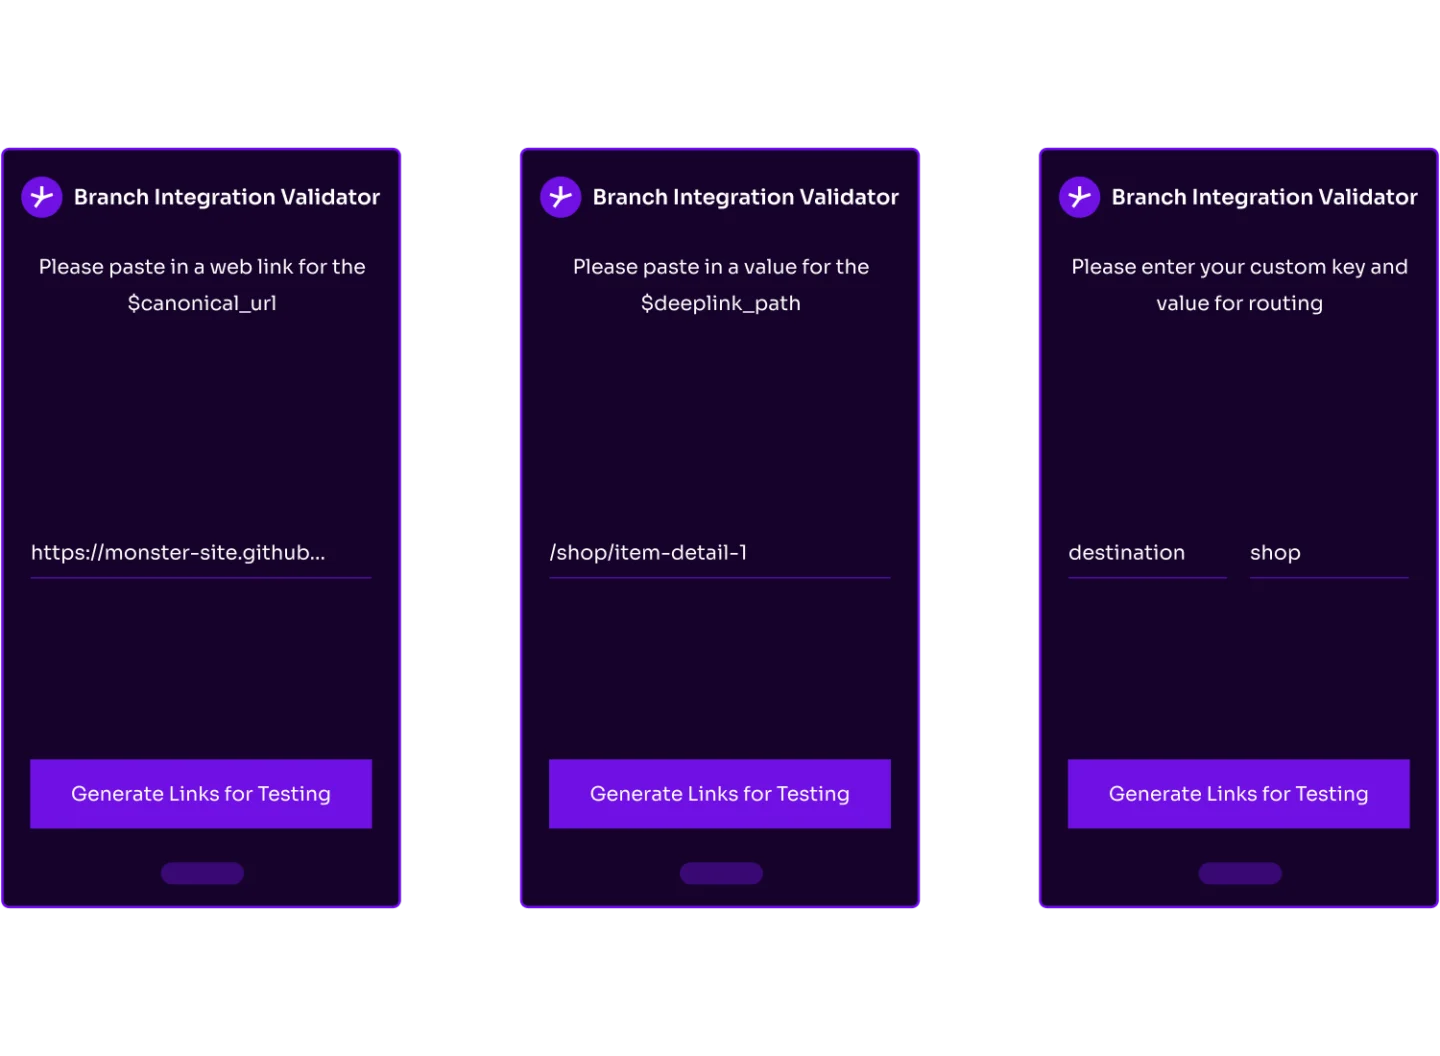
2. Choose your routing key. You will see three options:
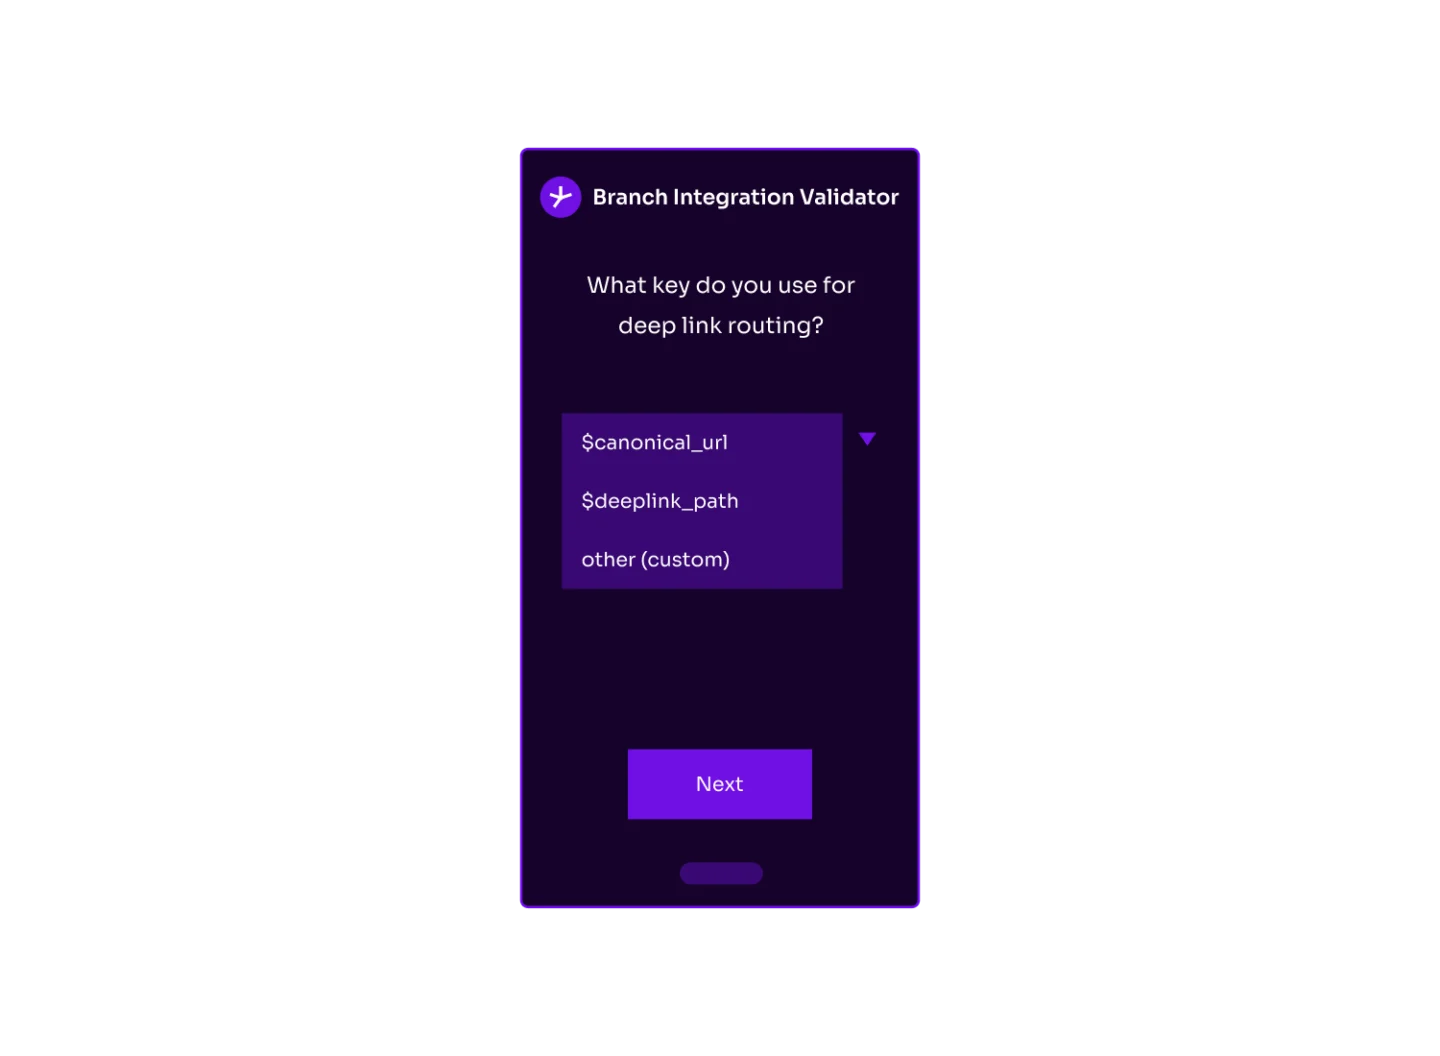
- $canonical_url:A Branch parameter used when a full web URL is required for deep linking, such as:https://monster-site.github.io/shop/item-detail-1.html?id=1.
- $deeplink_path: A Branch parameter used when the app expects a relative path for deep linking, such as: /shop/item-detail-1.
- Other (custom): Select this option if you don’t use $canonical_url or $deeplink_path, for example, if you route using another defined parameter.
3. After selecting the option that matches the key your app uses for deep link routing, click ‘Next.’ You’ll see one of the following screens, depending on your choice:
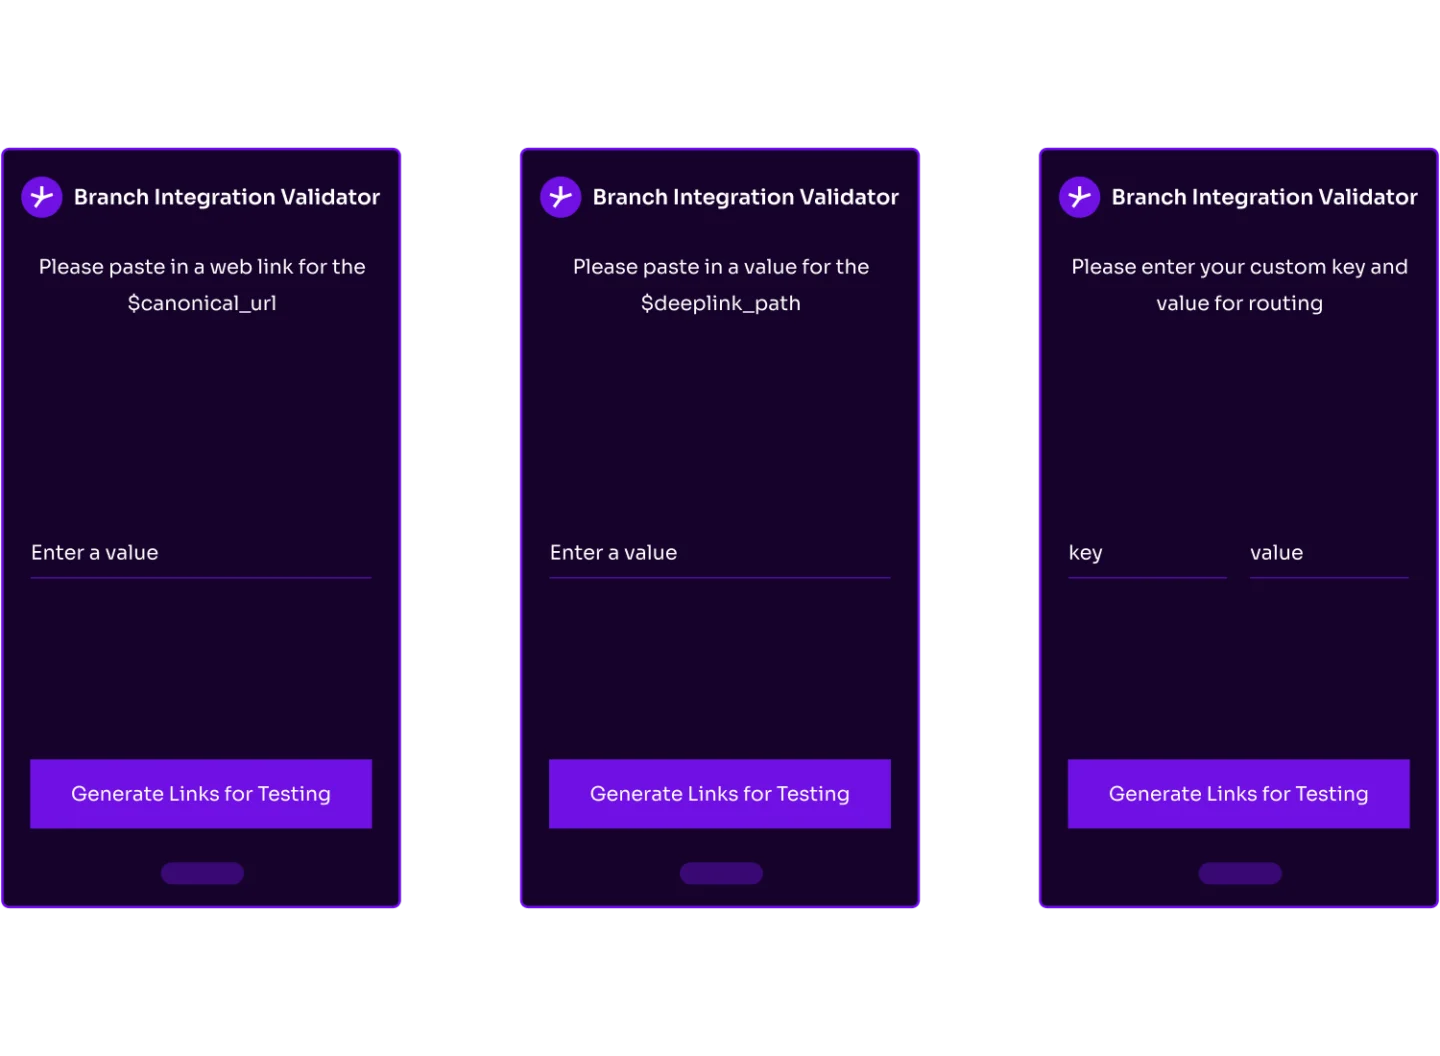
On this screen, enter the corresponding value for the key you selected in the previous step. If you chose ‘Other (custom),’ specify the key and value used for routing.
4. Click the ‘Generate Links for Testing’ button at the bottom of the modal.
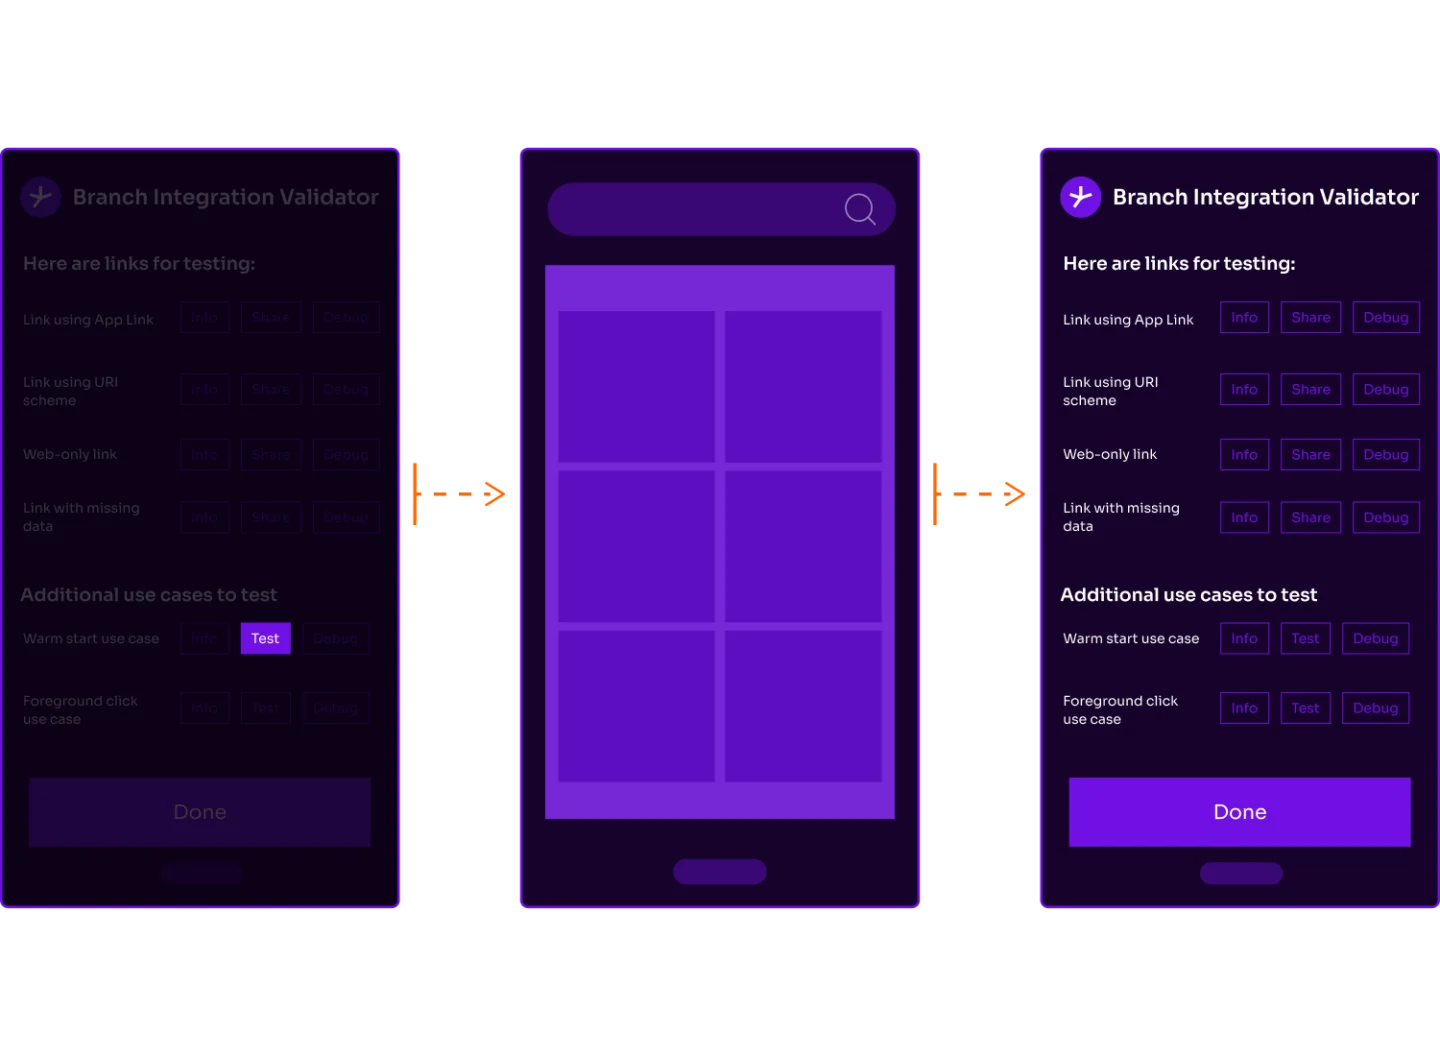
The modal is now divided into two sections: ‘Links for testing’ and ‘Additional use cases to test.‘
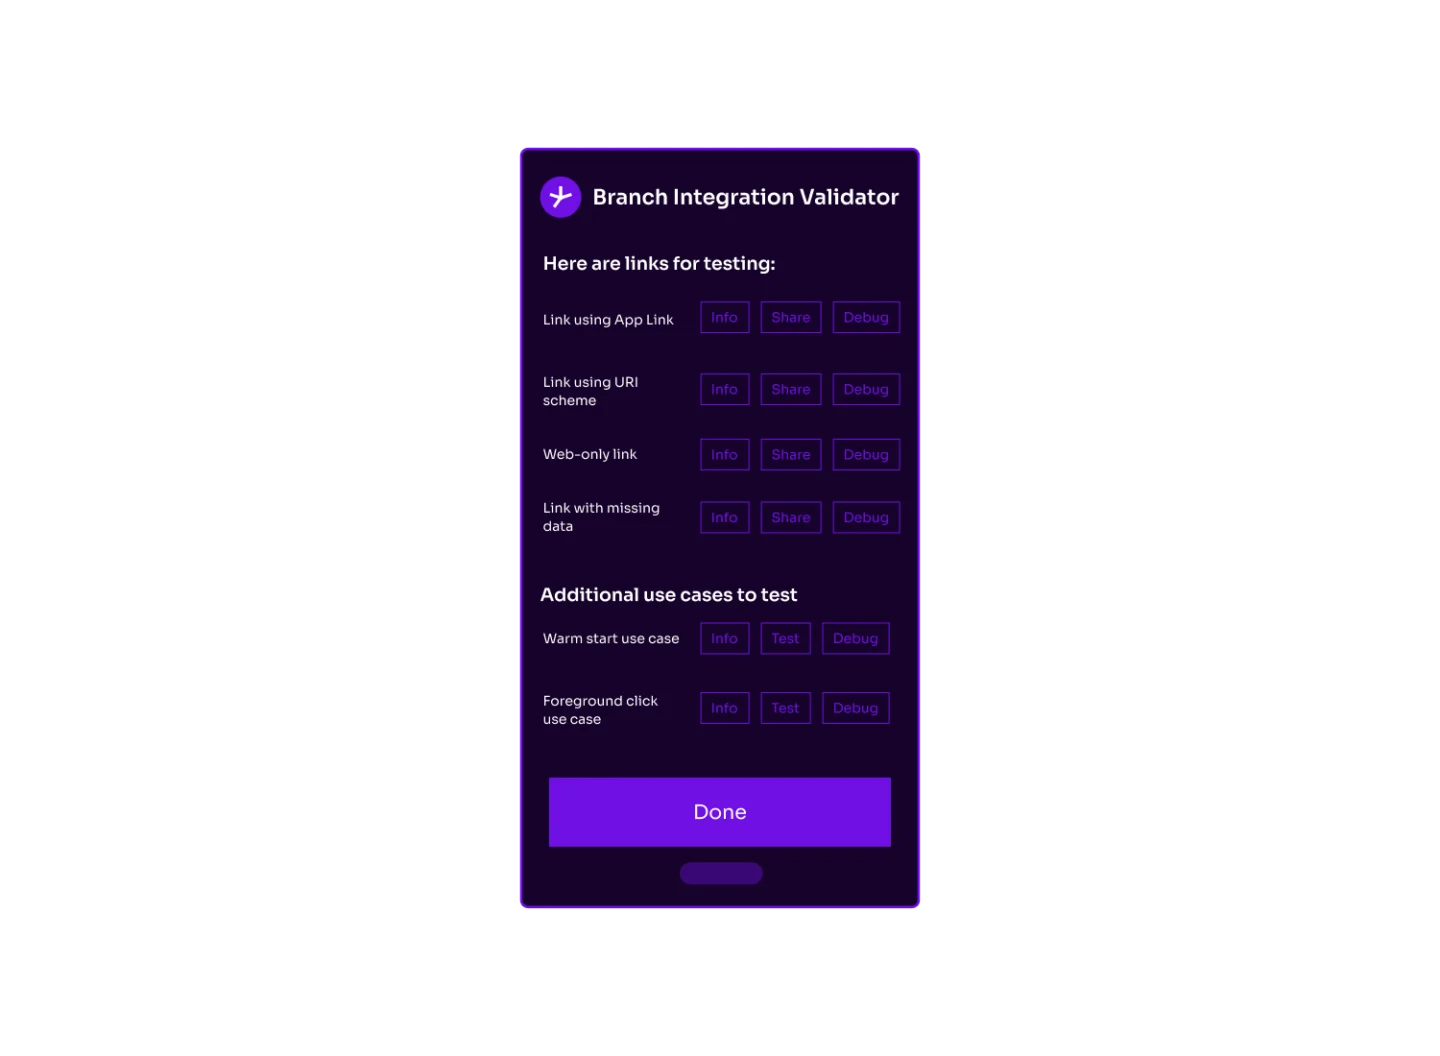
Each link has a row with three buttons:
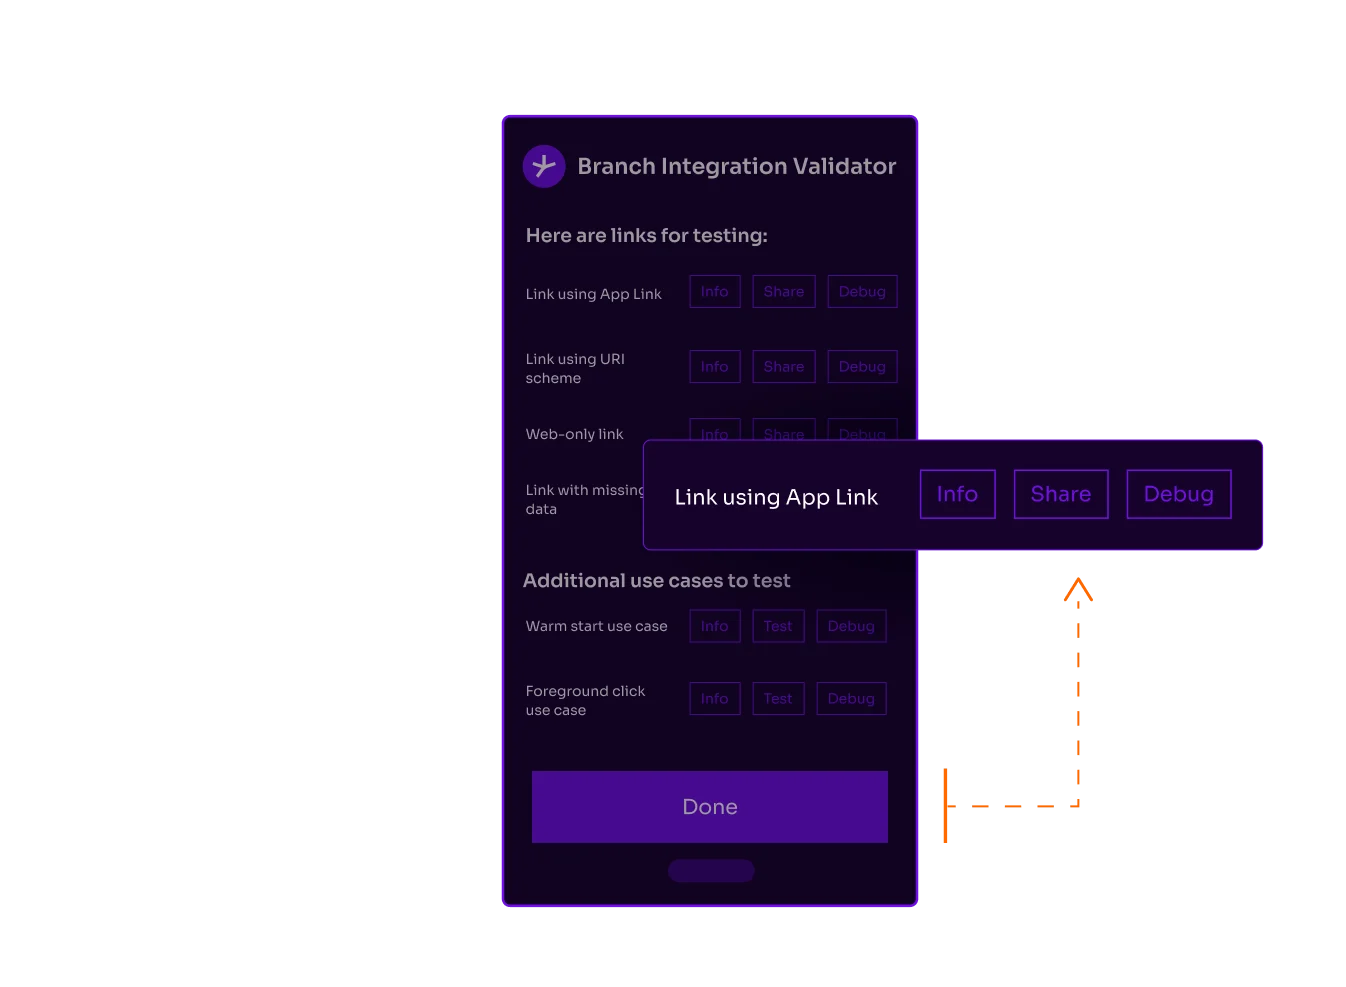
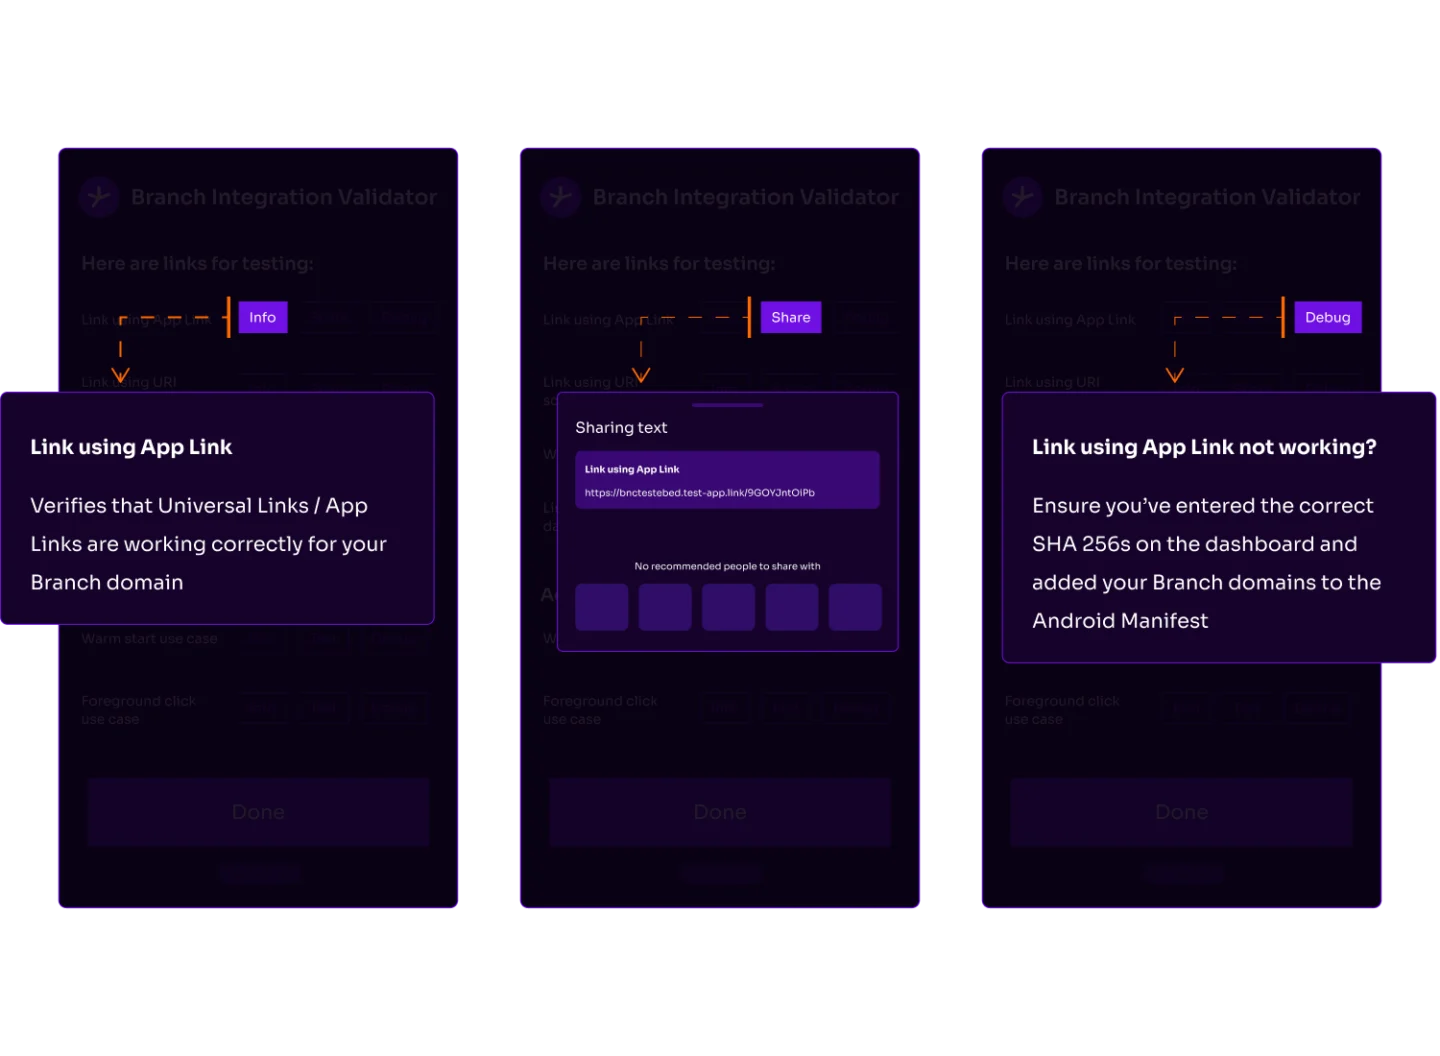
- Info: Gives you more information about how the link is set up and why it’s important to use for testing.
- Share: Allows you to share the test deep link with yourself or a teammate via Slack or Messages.
- Debug: Provides additional information in the event that the link doesn’t behave as expected.
5. Similar to the rows with links, there are rows for additional use cases to test, each with info and debug buttons. The middle button, labeled ‘Test’ instead of ‘Share,’ lets you directly test the use case. For example, clicking the ‘Test’ button for the warm start use case will background the app and trigger a link click to verify that the warm start functionality for Branch links is properly implemented.
If your app has deep link routing set up, you should be routed to the correct screen. You can also check the logcat in Android Studio to verify that the app correctly fetched the deep link data on warm start.

Using Branch’s Integration Validator ensures you spot and fix issues quickly. Before releasing your app, take two minutes to validate your configurations and test deep linking.
Want to learn more?
Check out the following resources:
For troubleshooting assistance, reach out to your account team. To get started, request a demo today!