This blog post was originally published in 2016. You can read one of our newer posts on web-to-app conversions.
Companies that use smart app banners are continually surprised at how much traffic it drives to their native mobile app. In fact, it’s so effective that some companies like Yelp and Pinterest have turned their entire mobile site into a big “Install” button, not allowing the user to progress to the mobile website and forcing them to install the respective mobile apps. To confirm our hypothesis of its importance, Branch pulled the data about the broader industry, and found that the majority of the all-time most downloaded apps are using mobile web app banners to boost their install traffic.
Smart app banners were introduced by Apple back in an early version of Safari, but the concept never gained traction with other browsers. So even if you enabled the Safari version, it wouldn’t work for any other browser (Facebook, Twitter, or any Android browsers). As app developers ourselves, having to build one-off hacks per platform has been the bane of our existence. So we fixed it.
Enter: Journeys by Branch
We built an entire optimization studio in the Branch dashboard to help companies quickly get started on leveraging the power of the web-to-app install channel. The ability to create a simple smart banner that works across both Android and iOS will always be free, but there are many advanced premium features available, such as audience targeting and A/B testing.
Yes, that means you can get started with your own site’s banner for free by signing up at https://dashboard.branch.io/, then navigating to the Journeys section of the dashboard.
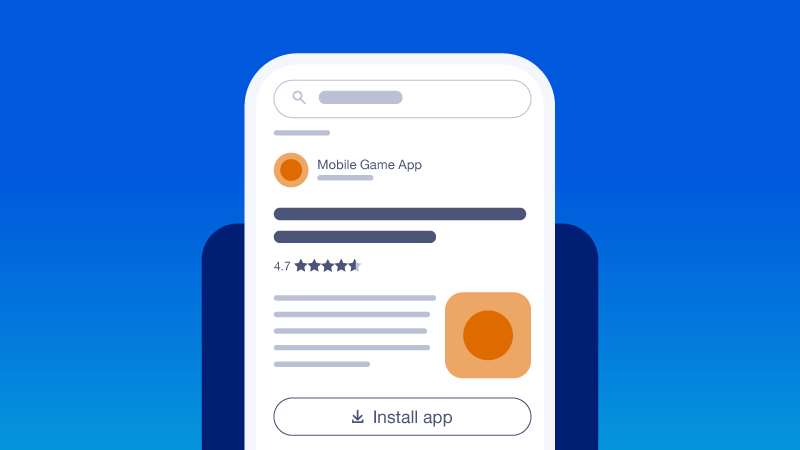
What Does a Smart App Banner Look Like?
Using Branch’s Journeys platform to build your free smart banner gives you a number of options in styling, icon selection, star count and call to action. You can even change this on the fly from the dashboard, without changing any code on your website. Here are two examples of mobile web banners from Jet.com and Target.com, each featuring a design built and deployed with the Journeys platform.

Deep linking? Attribution?
You’re probably thinking: “Why don’t I just build this myself?” There are many reasons why you don’t want to, but the first big ones are around the use case of supporting deferred deep linking and attribution.
Deep linking allows you to pass data through the App Store or Play Store, and route the user to the right page after install. If the app is installed, deep linking will open up the app and take the user to the right page. It’s a powerful technology that allows apps to work like websites and drive conversions. Most brands that end up routing to the contextual page after install see more than 200% lift in conversions.
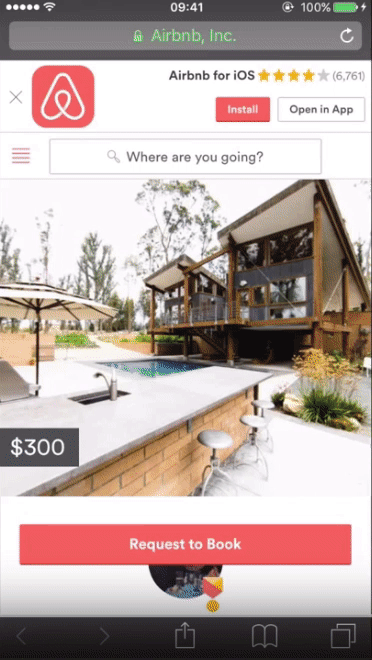
Below is an example of Airbnb using Branch to deep link from their Journeys banner to a listing page after install.
Attribution allows you to track how many clicks, installs and other events like signups or purchases happened from each channel. Let’s say that you were to change your banner’s button text from “Install” to “Don’t Install.” Obviously, you’d expect that fewer people would click on the banner and ultimately install the app with the new text. Attribution data would let you know exactly how big of an impact this change had on your app installs.
This attribution data is incredibly important because you’ll find that your website will be a huge source of installs for you, so you’ll want to optimize this user flow to squeeze the most out of it. Without measurement, you’ll be left in the dark.
Why is the Banner “Smart?”
One of my personal favorite features is something you’ll find uniquely on the Branch platform: the ability to know if the app is currently installed from the browser. This means that if the user visits a mobile website, and has the app installed, Branch can show a different message than if the user did not have the app installed. Here, you can see the example of the Jet app banner before and after I installed the app.

Branch does this by storing a database of cookies on its domain app.link, which are paired with the IDFA or GAID. Then, when you add our native library to your native app, we will know when the user has installed your app. We expose this boolean to you via Journeys and the basic web SDK.
Preparing Your Website For a Smart Banner
Now, let’s get started.
First off, you’ll need to add a script to your page that enables Branch to add the banner remotely. It’s a very light-weight JS file that manages everything for you. Just paste the following into the header of your site.
Note: that there is a lot of other powerful functionality available in the web SDK that you can review at your leisure.
How to Configure Deep Links
Now, if you’d like to add deep link routing for users that install your app, you’ll likely need to pass some reference information. Branch will automatically pass through the referrer and other things, but you might want to add some custom keys and values to pass additional state through to your native app.
To do so, you need simply call setBranchViewData()immediately after you call init() and pass in the dictionary of data that you’d like to send through to your app.
I won’t cover the details of adding the native app SDK to retrieve this dictionary of data, but you can review the full integration process on our documentation portal.
Designing the Banner
Once you’ve got the Javascript snippet on your site, you’re nearly finished. Now, you just need to design the styling and text of the banner that you want to appear on your site. You can find these customizations in the Journeys tab of the Branch dashboard. Simply click on the “Create my first Journey” button to get started.
First, you’ll want to label your Journey. You’ll use this later for reference and for viewing the analytics, so make sure it’s named something distinctive.
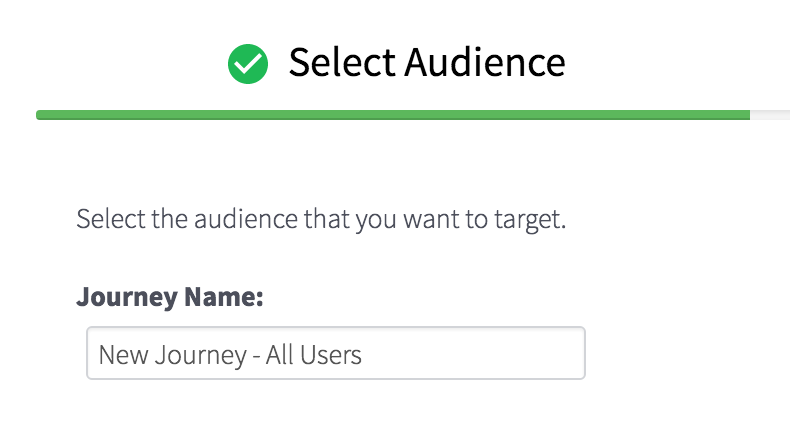
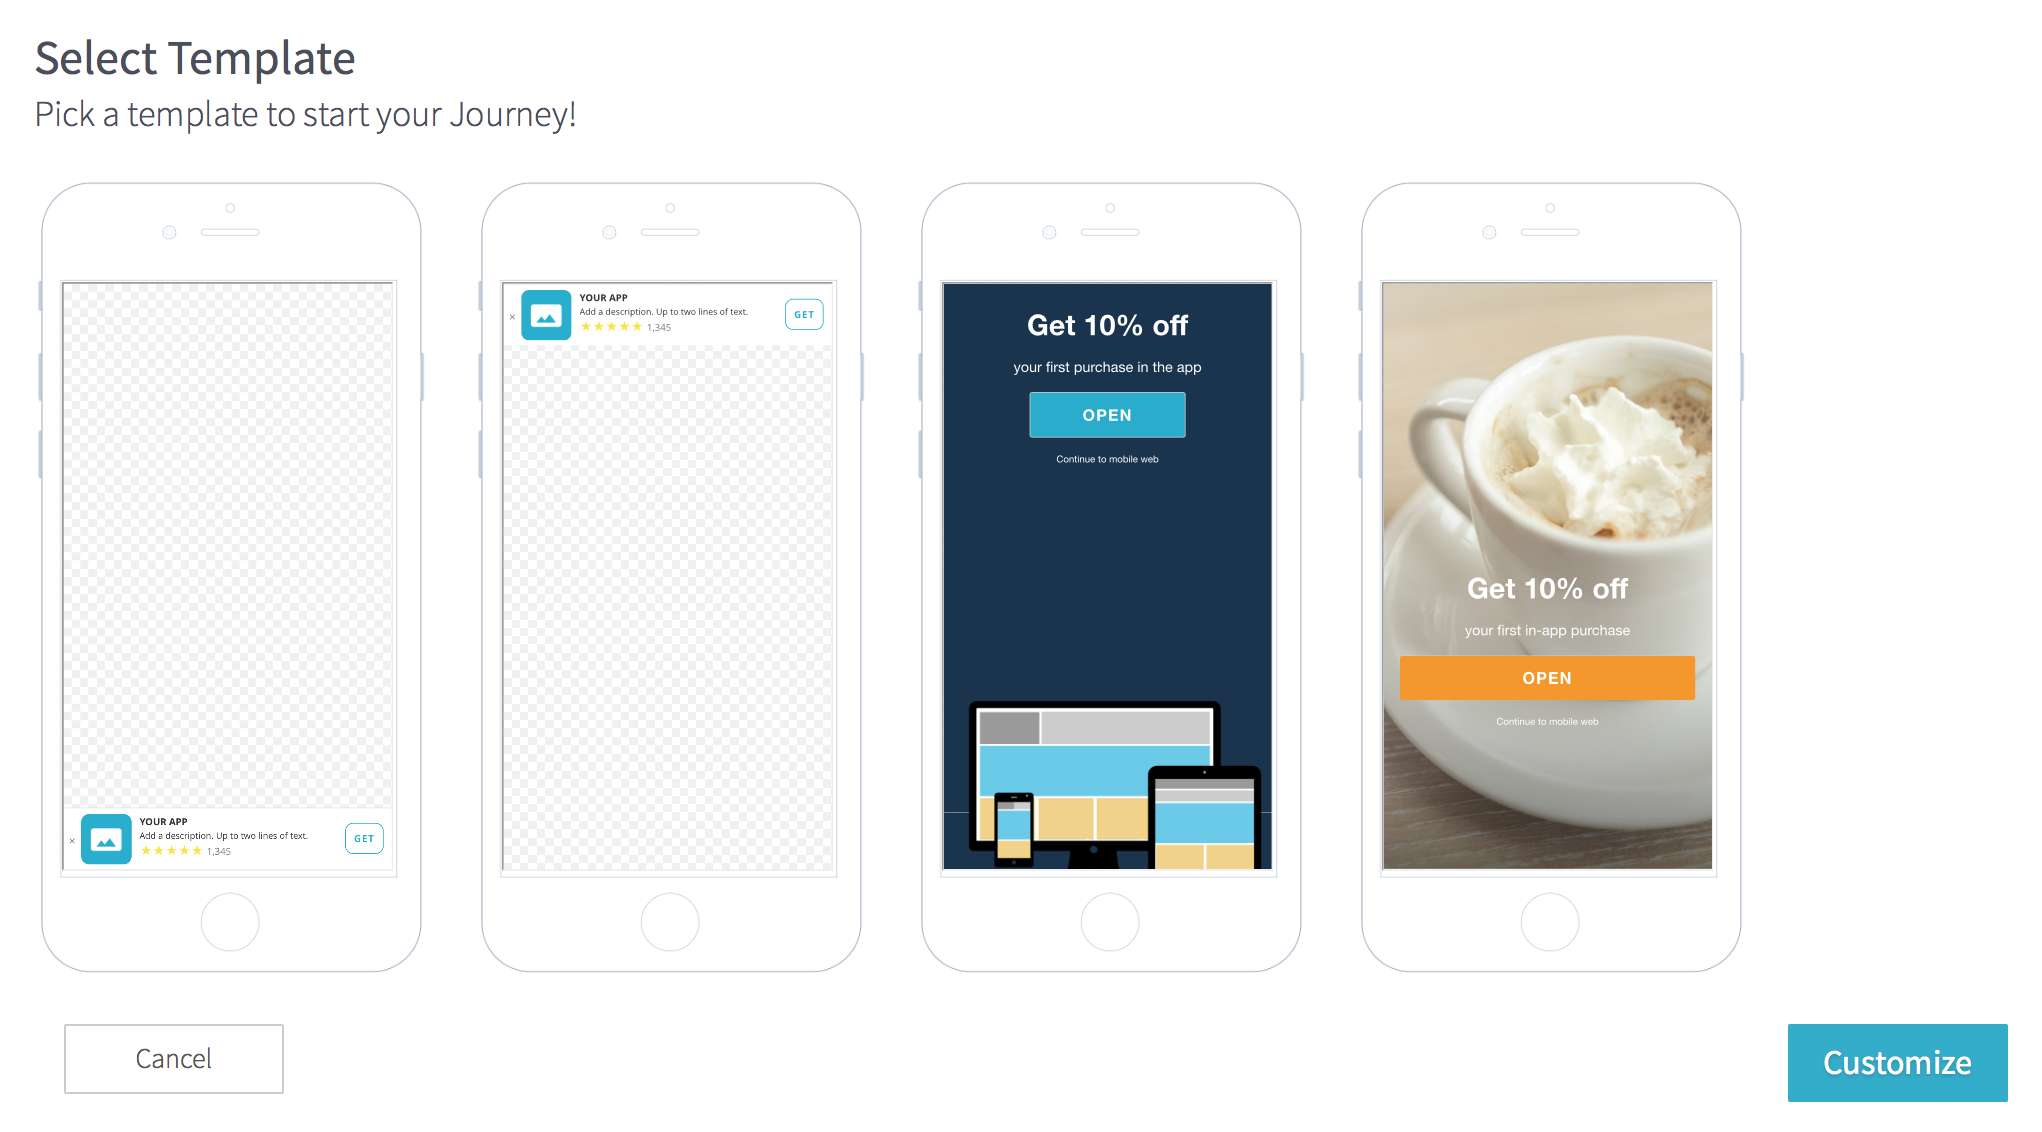
Once you’ve done that, ignore the audience criteria, and select “Save & Continue” to proceed. On the next page, you’ll want to click “Select a Template” to take you to the page where you choose the type of banner you want. Choose the “Banner” option from the list and click “Customize.”
On the following page, you’re given the option to customize all of the aspects of the Journey from text, fonts, styling, and colors. It’s a powerful editor that will let your creativity run wild!
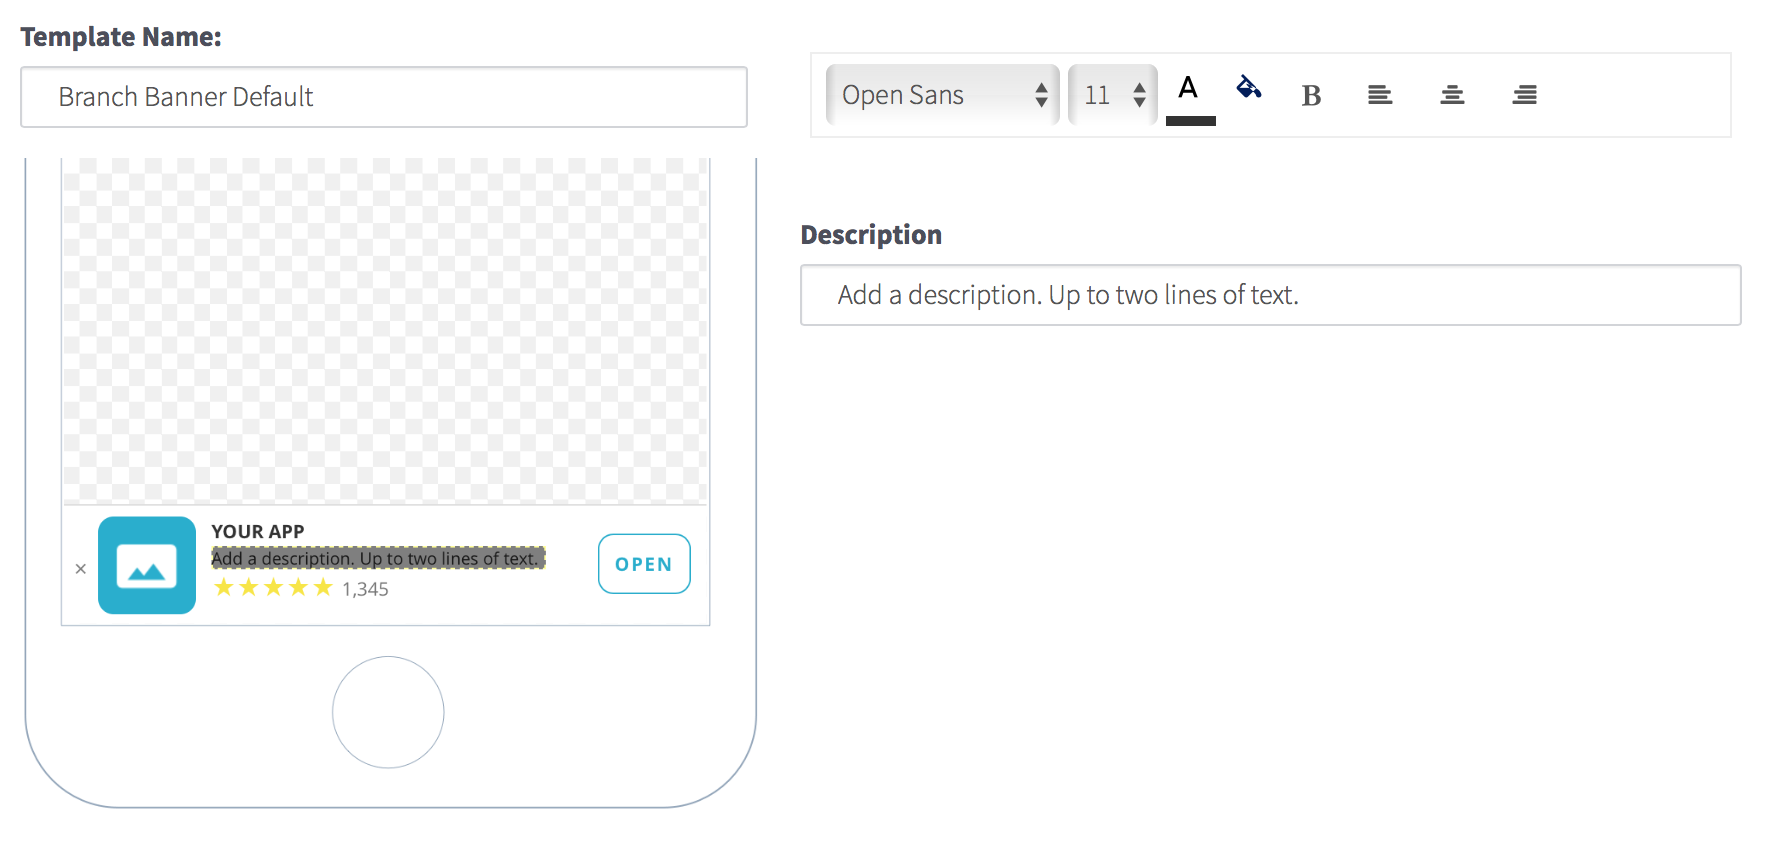
Once you’ve perfected your banner, simply “Save,” then “Continue.” The final validation page will give you a chance to preview your creation on your own site. Once you are happy with it, just click the final button to deploy it to production. Your smart app banner will immediately be live and visible to all your mobile website visitors.
Premium Features Worth Paying For
As you go through the Journeys flow, you’ll notice there are a lot of premium features like advanced targeting, a CSS editor for your designs and much more. We recommend you get started with the free smart banner right away, then move to upgrade to the more advanced features when you’re ready.
May your installs always flow freely.